http://www.vickauto.com/newstore/index. ... ts_id=3514
The car drives pretty good now, why replace my dizzy?
1)Well, even after many attempts at repair, my dizzy still frequently sticks too far advanced when I slow down to idle. I can usually correct this by forcefully tapping the gas, but I don't like it doing this.
2) I thought it was my vacuum advance, so I disconnected it. That did help meaning my vacuum (retard actually as I understand it) did have some issues also. A vacuum advance is sort of pricey and I am not sure I can get it installed properly. Plus, it seems like I get worse gas mileage without the vacuum working properly.
3)I upgraded to electronic ignition years and years ago (I have an original 1979 Brava dizzy and coil - I have replaced the igniter) but I have been concerned about running with a coil that old (even though it seems to work fine right now), and a direct replacement coil is sort of pricey.
4) I run without an exhaust heat shield, and even if I replace the vacuum, I expect the exhaust heat to shorten its life.
5) Even if I replace the vacuum, and perhaps just replace the advance springs (that might fix the advance stick issue), I still have a worn dizzy and a senior citizen coil...
So I decided to go this way because
1) I get brand new everything (dizzy, coil, vacuum, igniter, wiring) for not much more than just buying the parts to keep my old girl going.
2) I can RELOCATE the dizzy to the intake side of the engine and get it away from all the exhaust heat. This just seems to make sense to me as a better location overall. This was the original location on older models, and I understand European models never moved it to the exhaust side.
3) I still have an entire working backup system (or can sell it) if I don't like it or if it breaks.
Now, there are some issues that gave me pause:
1)While brand new, the dizzy is from a Lada. It turns out it is built tank-like, but not too pretty to look at
2) The new dizzy comes with two different spacers, so I will have to experiment to get the proper fit.
3) I will have to "modify" the plug currently in the engine block to make it short enough to plug the cam hole when I remove the original dizzy.
4) None of our usual vendors carries caps or rotors for this dizzy (or igniter or wiring). I looked online and found many vendor that carried parts for the Lada dizzy, and Vick's tells me they now carry replacement parts.
I received the parts from Vicks.
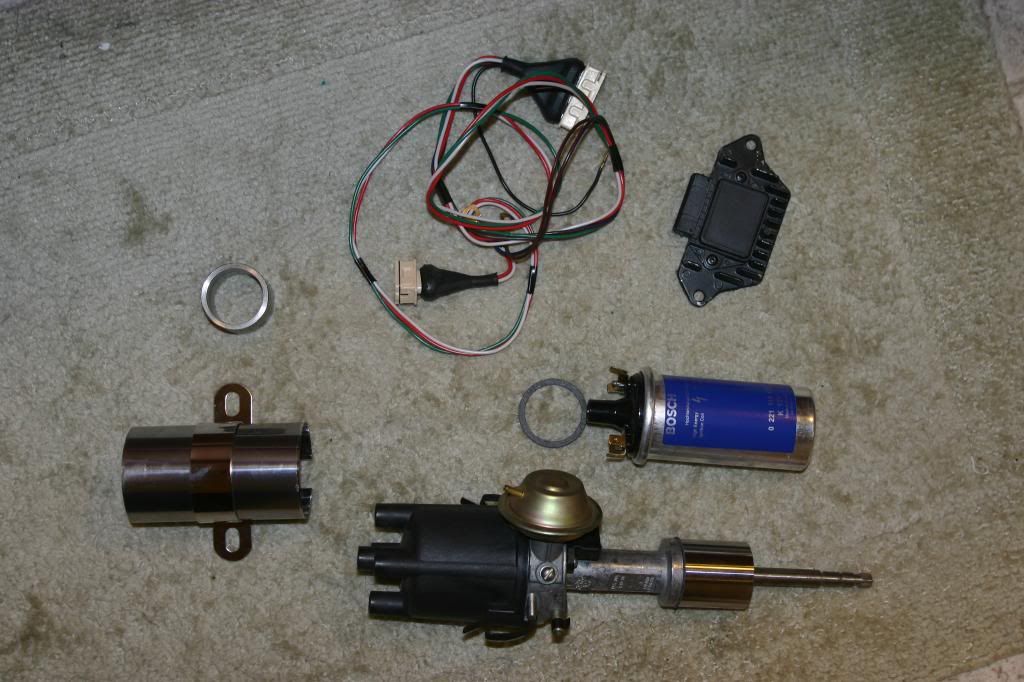
The kit included:
Distributor (complete with rotor and cap)
Two different spacers/adapters
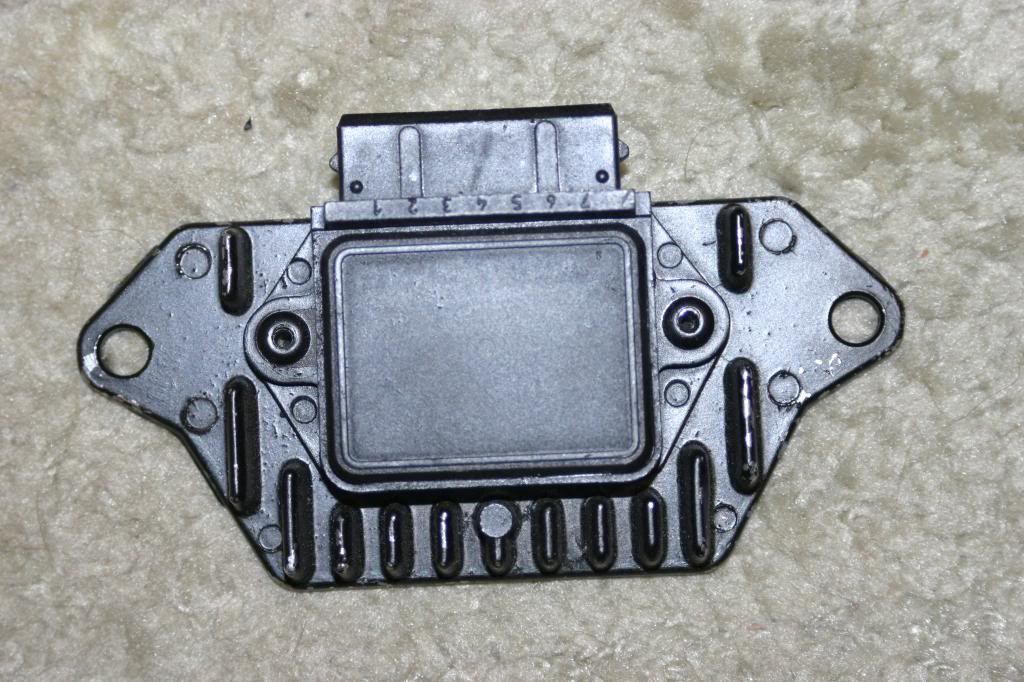
Igniter mounted on its own heat sink
Coil igniter wiring harness
Bosch coil
Mounting bracket for the coil
Two gaskets
(note the pictures are too "big" for this board, sooner or later I will shrink them and repost, I just don't feel like taking all that time right now)
Here it the full set up:
First impression:
The main parts look Russian made. The cosmetic quality looks bad, but the gear seems solid, heavy and somewhat tank-like. The wiring harness seems like it is from the 70's and overbuilt, but I consider that a good thing.
It came with NO instructions save the photo below (not much help to me...). I sure am glad I chatted over the phone so I have some idea of what I need to do. I contacted Vick's and they e-mailed me a document with pictures and instructions for wiring.
The original instructions:

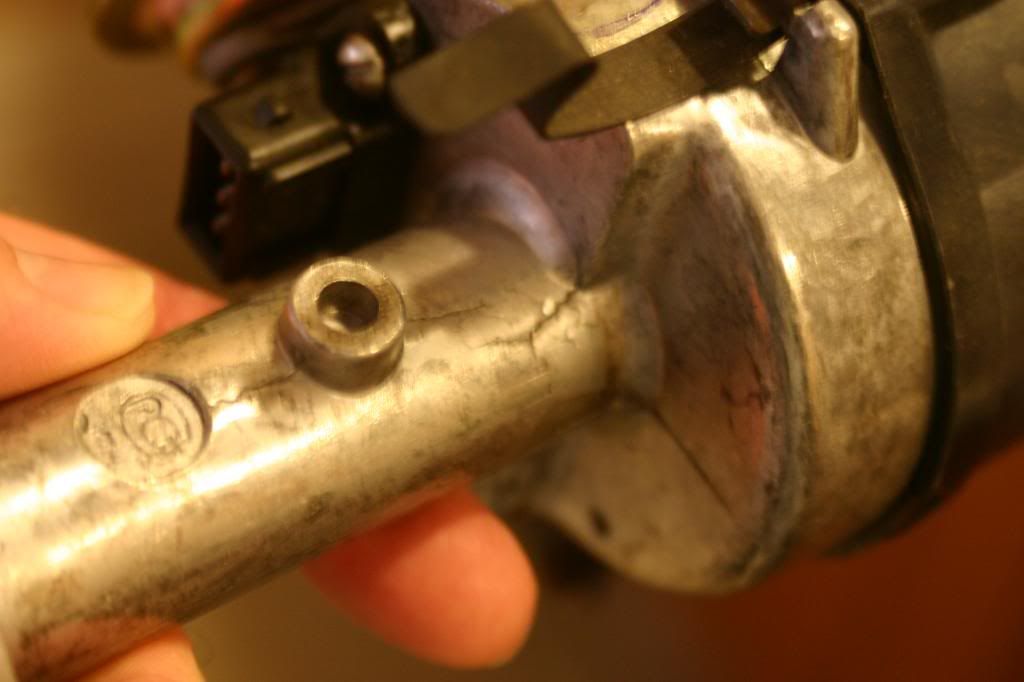
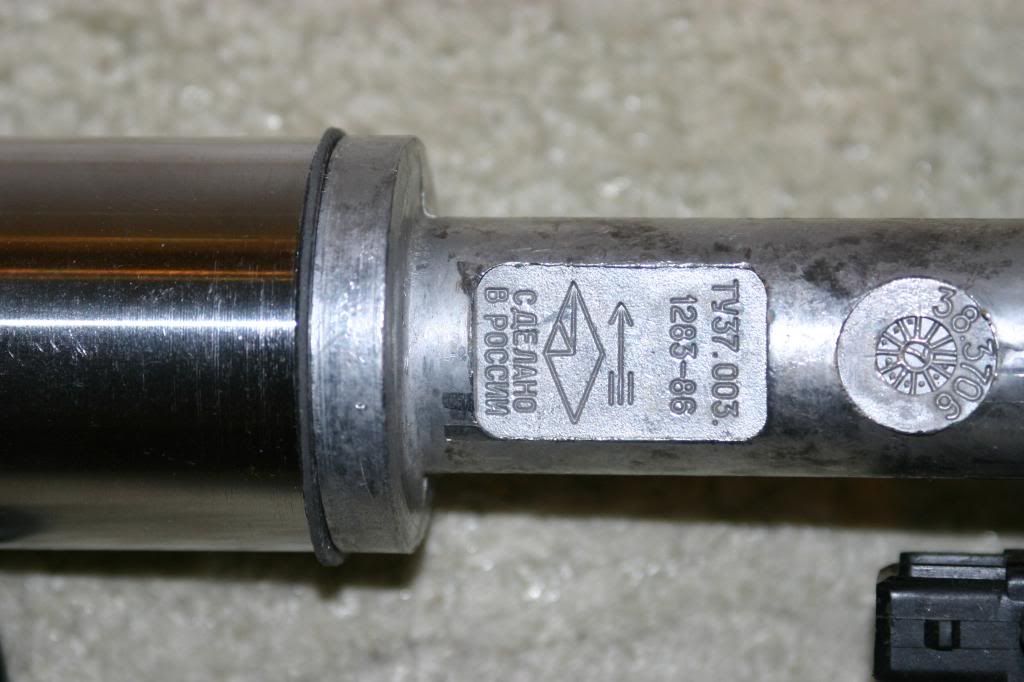
The distributor:
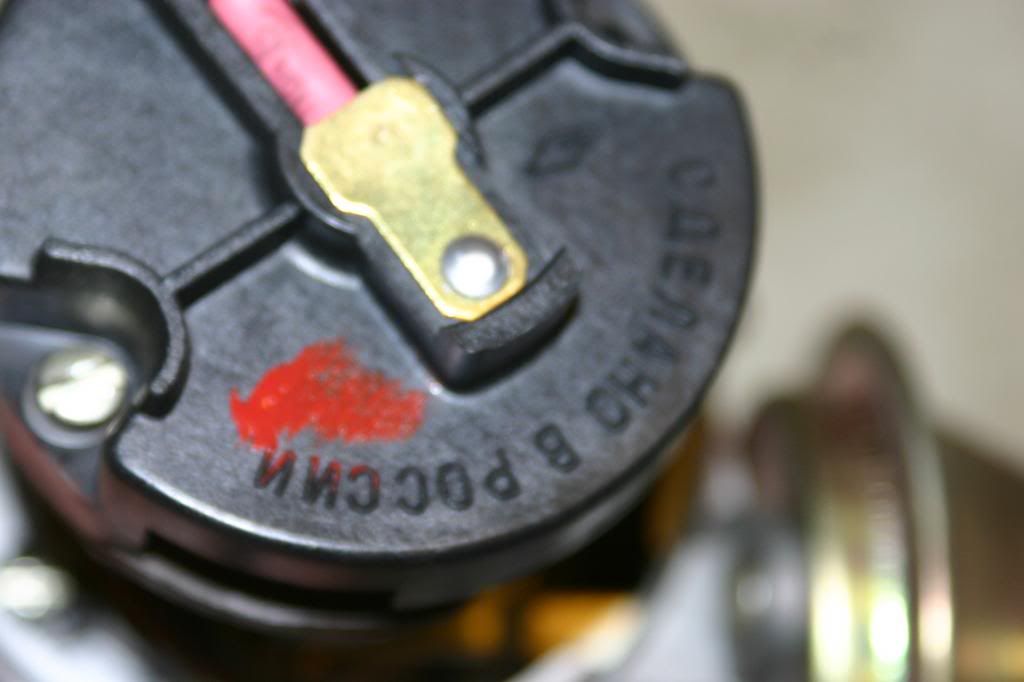
The casting is marked in Russian and while it looks solid, cosmetically it looks, well, like something the Russians would make.
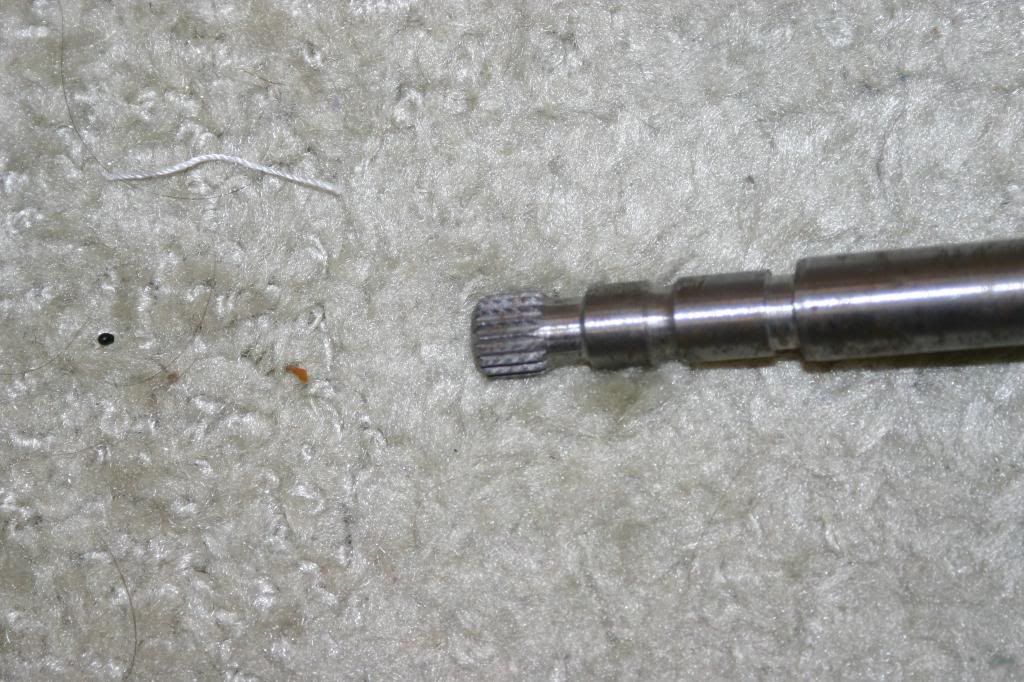
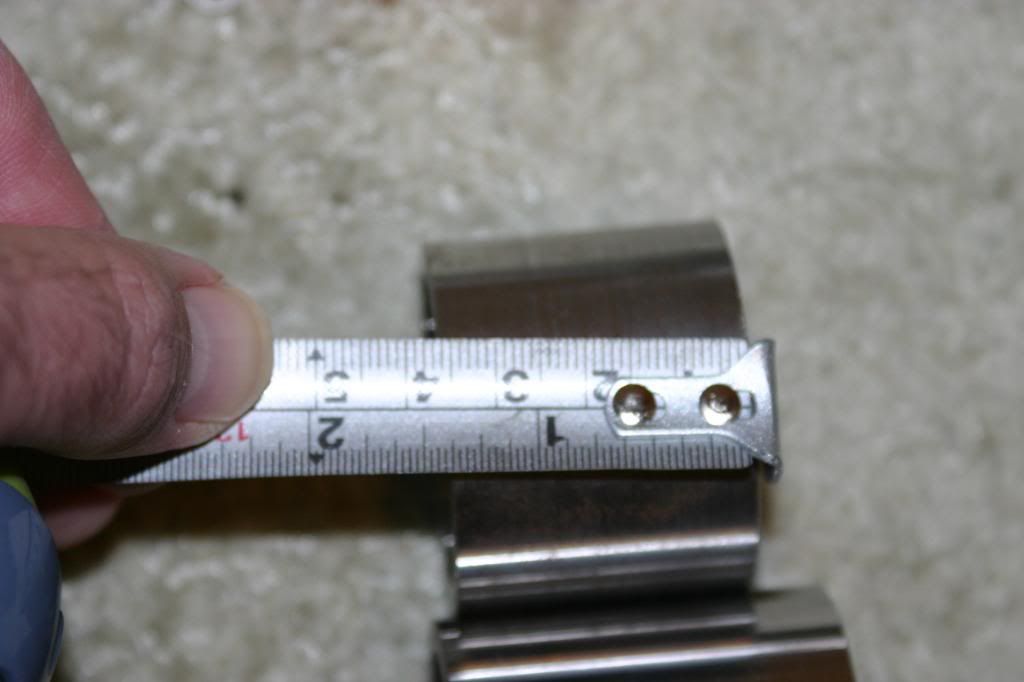
With the cap on, the unit measures about 14 inches. And it has a small gear on the end that will drop in to the oil pump (gear here, pictures of the engine later...)
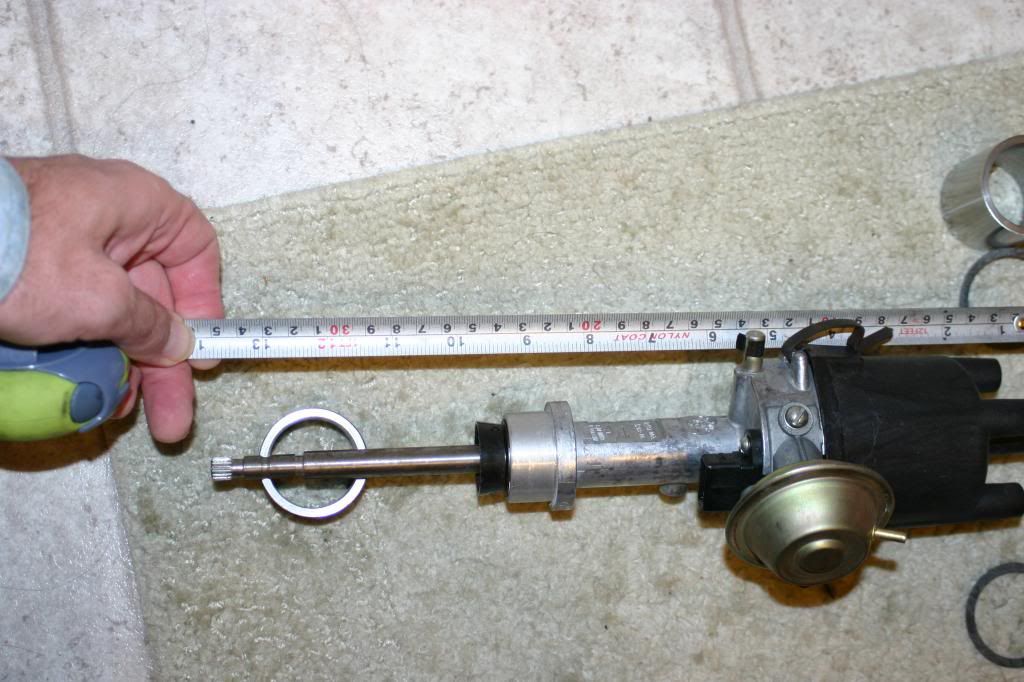
Gear tip:
The distributor cap looks rock-solid and well made. Cosmetically, much nicer than the main casting:
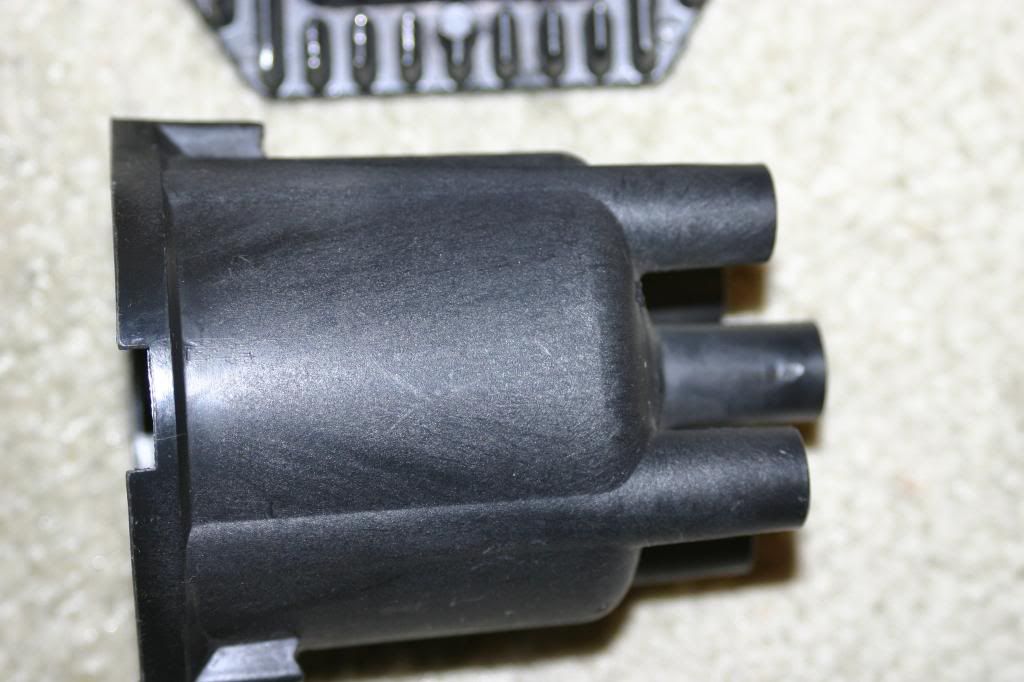
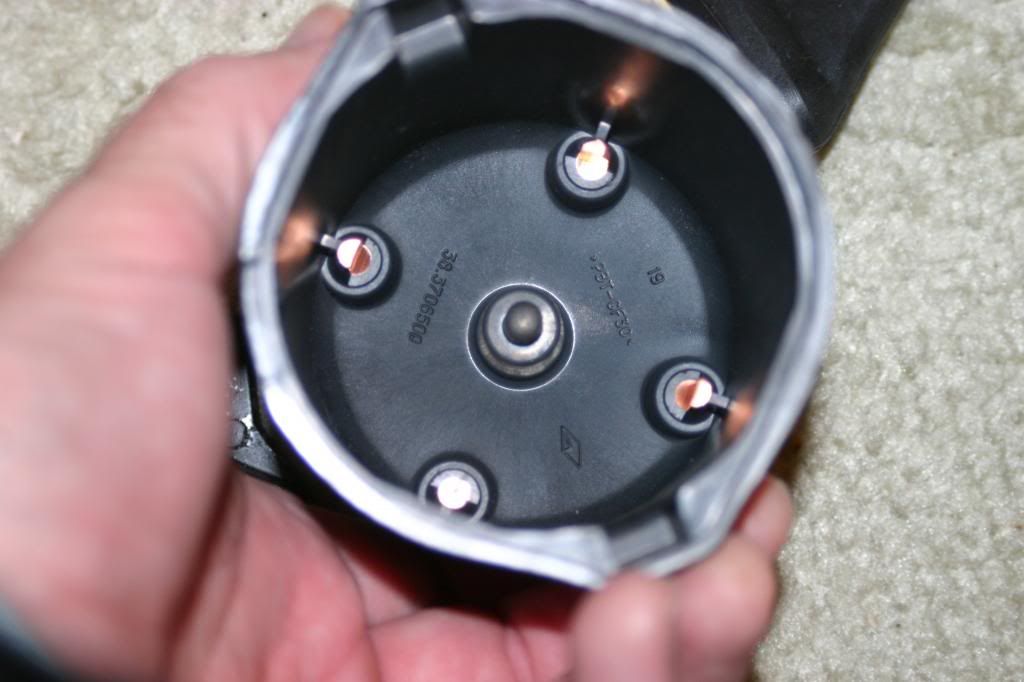
The cap is held on by two "clips". I like the idea, and it feels solid, but time will tell how durable the set up is. I popped off the cap to look at the rotor, and to my surprise, it only has one screw. It looks like one is missing, and I will try to find a fit before install.
The igniter looked like it had been poorly painted black. Almost like this was a recycled heatsink. Vick's ensured me the parts were new, just Russian.
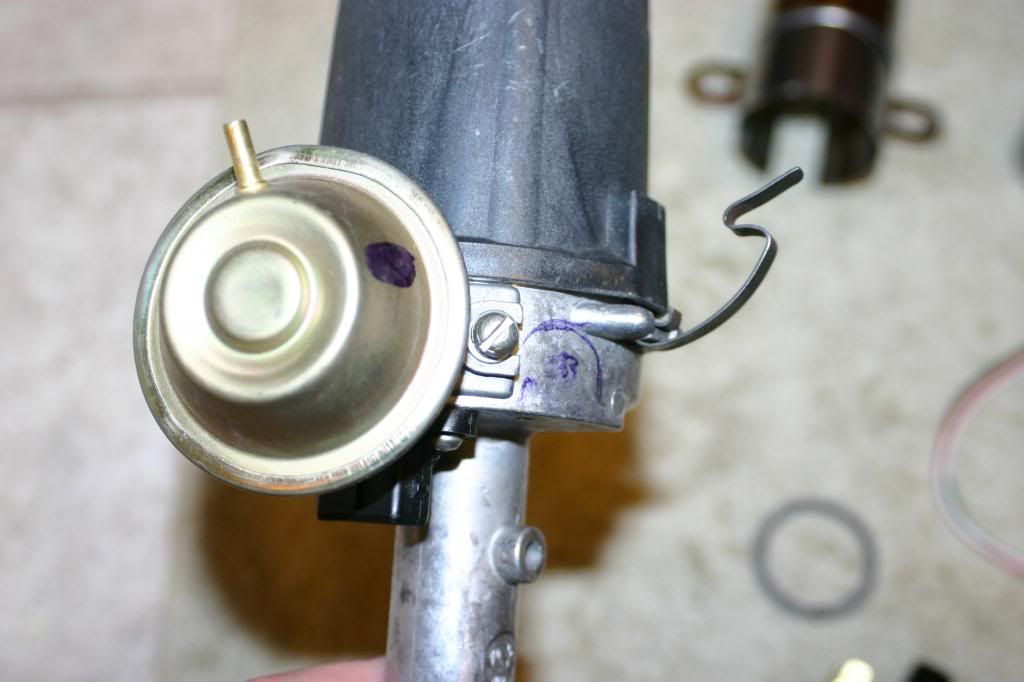
The vacuum advance looks new, but again the cosmetics look sub-par. Hopefully it functions better than it looks.
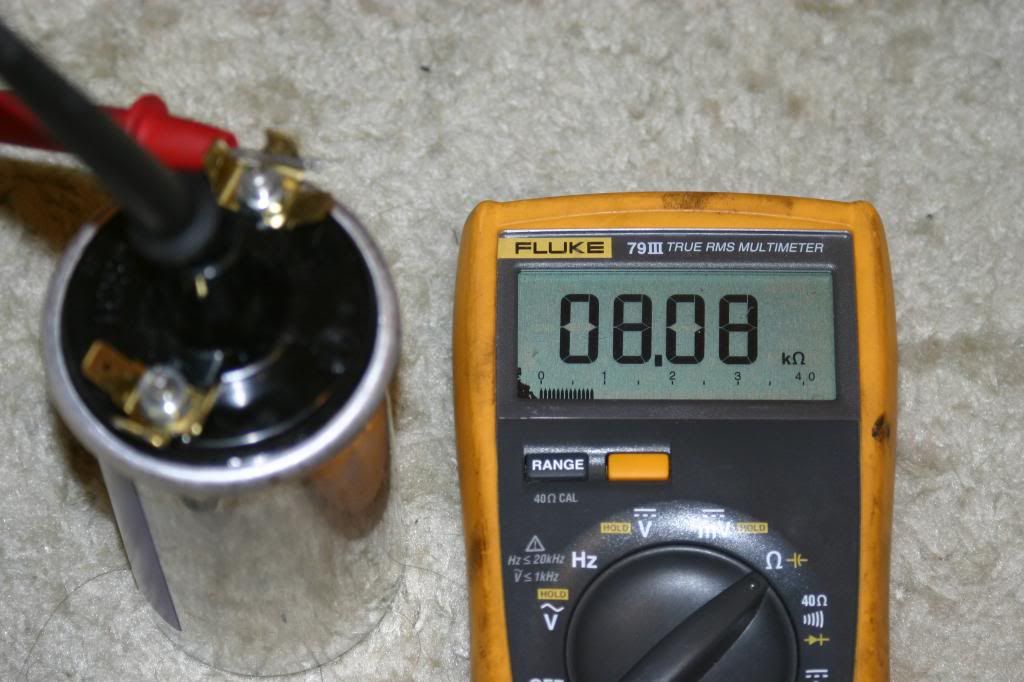
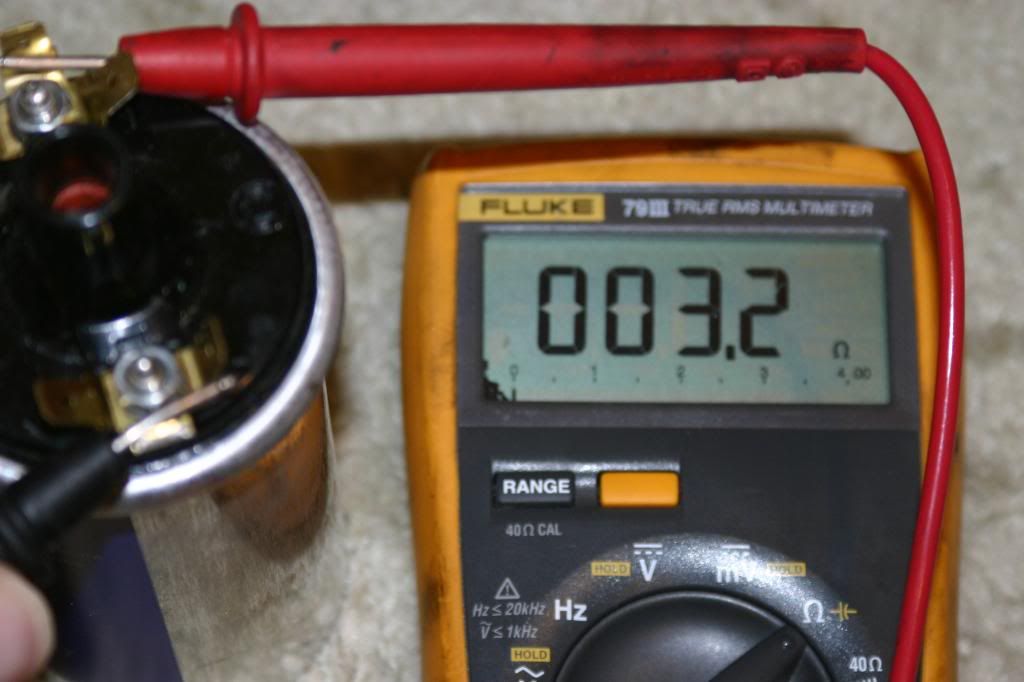
The coil is a made-in-Brazil Bosch. They said they were out of the normal coil, so this may be an "upgrade" over the standard package. Coil number 0 221 199 027 (if that means anything). It measures 8.08k Ohms from the center to either side terminal, and 3.2 Ohms between the two side terminals. The devices is about 6 inches tall.

It came with two spacers (the shaft is too long for it to drop in and seal properly. After some trial and error, I determined my engine requires the shorter spacer.
Test for Initial fit:
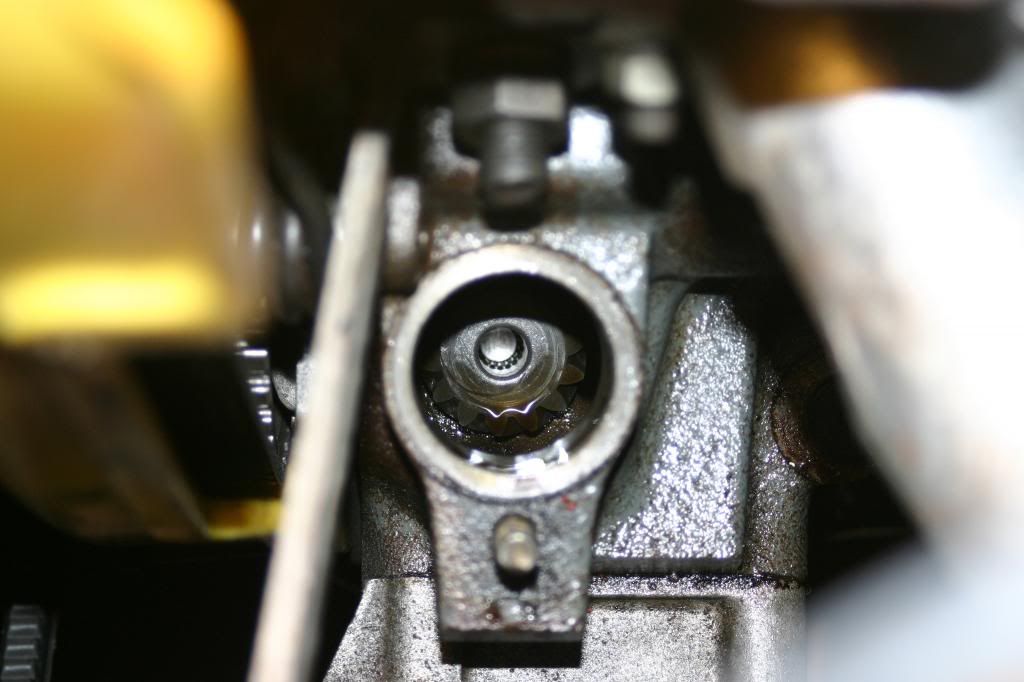
The unit mounts on the intake side of the engine near the alternator. You have to remove one bolt and take out a long "plug". I was surprised at how easy this was - I just lifted the plug out with my fingers. With the plug removed, you can see the oil pump, and sure enough there is a chamber that mates perfectly with the distributor shaft. Here is a picture of that chamber after removing the plug.
I set the engine to what I thought was TDC (by putting the car in 5th gear and pushing it while watching the timing marks) but I was off by 180 degrees (so I am setting it up for cylinder #1 instead of #4). I dropped it in, and again to my surprise, the thing fits perfectly - there is not much room in there but it fits just right and even allows me to put my stock 72 air filter cover on (and the intake nozzle fits right over the dizzy cap).
Here is a picture with the cap off. You can see how it barely clears the intake manifold, and the mounting bracket for the alternator. I can rotate it to time it, but there really is not much room - a perfect fit.
The original "plug" over this hole was held in place by a clamp (similar to that used to adjust the timing on the standard dizzy.) However, since the corresponding narrow portion of the new dizzy sits several inches higher than the original plug, the clamp cannot reach, and the dizzy cannot be held in place, or tensioned to hold timing. I contacted Vick's and they sent me long "stud" and a screw for the rotor. They have been very helpful and this was a mistake - the kit is supposed to include the long stud.
So, a bit of delay but things are looking good at this stage.
Note, you can right click on the image and select "View Image" to see the full version of all the pictures below.
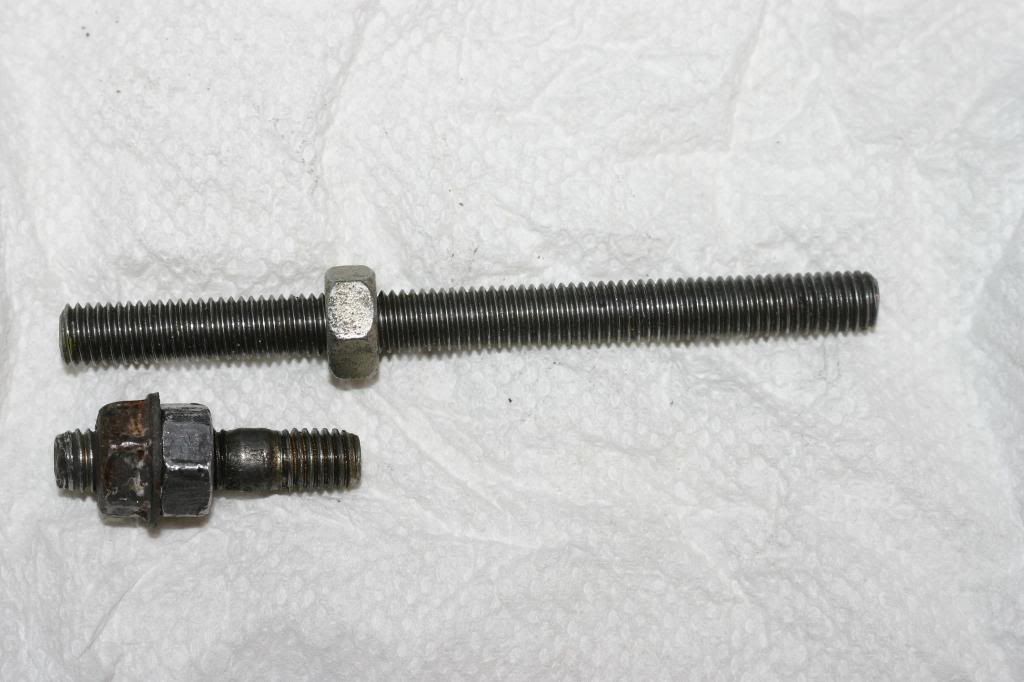
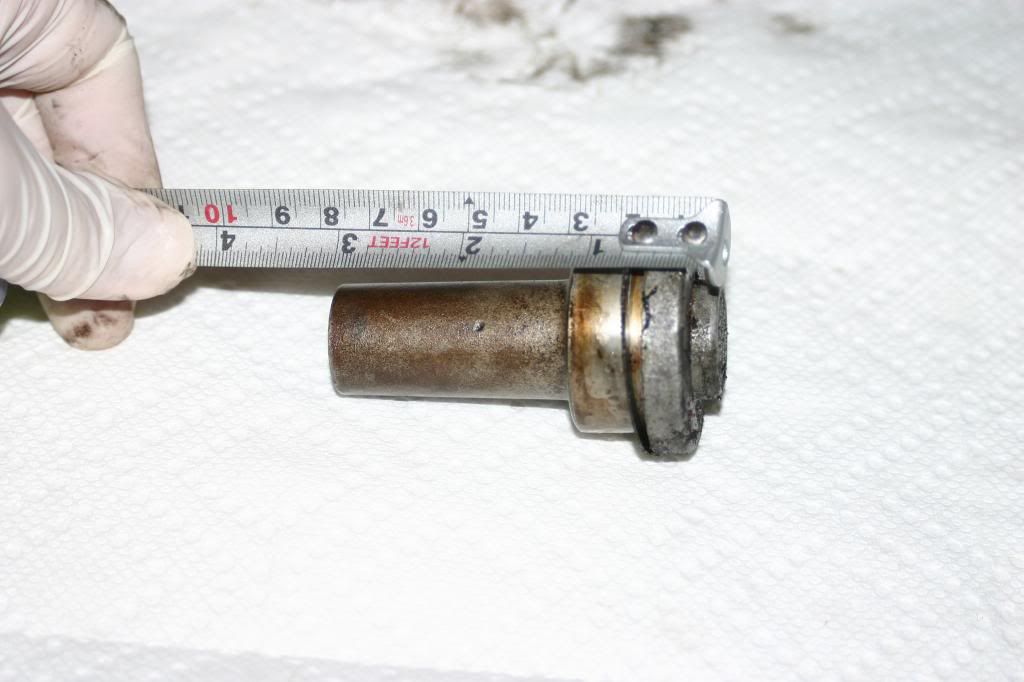
I removed original stud using a "triple" bolt. I then installed the new stud (it was about three times as long as the original) also using a triple bolt technique. Here is the old stud next to the new one.
Here it is installed.
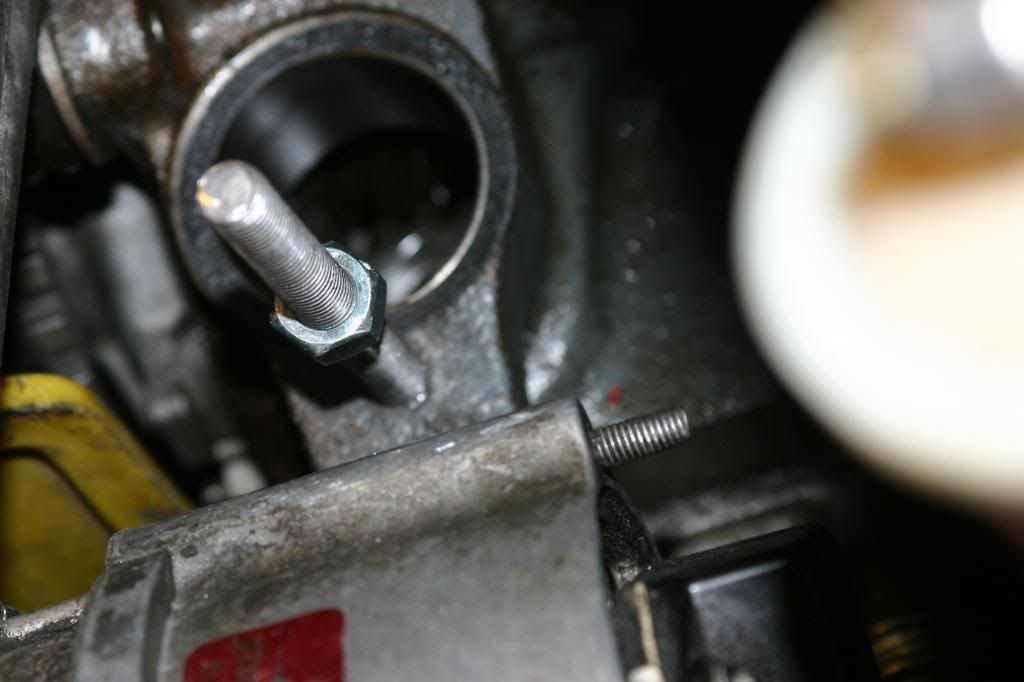
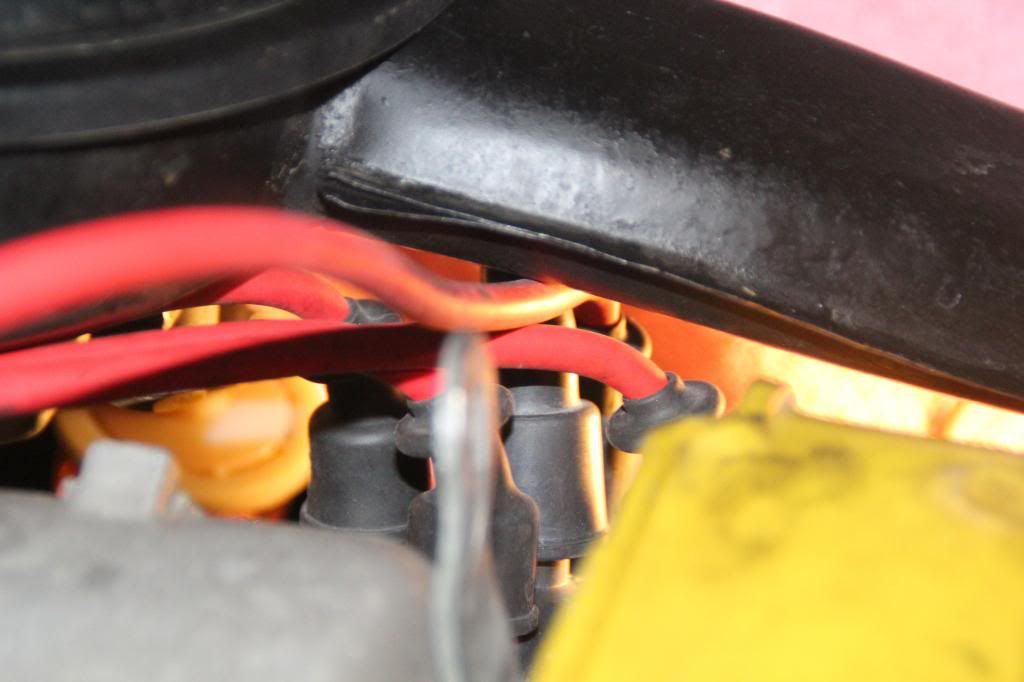
The long stud interfered with the wiring harness of the dizzy, so I only had about 15 degrees of total timing flexibility because of the stud and other clearances. In the pic below, you can see the stud and the harness.
If the stud had been about 1.5 inches shorter, I would have had a lot more timing movement. Anyway, I basically had to time the car by removing the dizzy cap, and physically lifting the dizzy shaft our of the gear pit, and turning the rotor, and then reinstalling. After the third try, I had the timing very close, and then the 10-15 degrees of movement was plenty. (I have it timed about 10 degree BTDC).
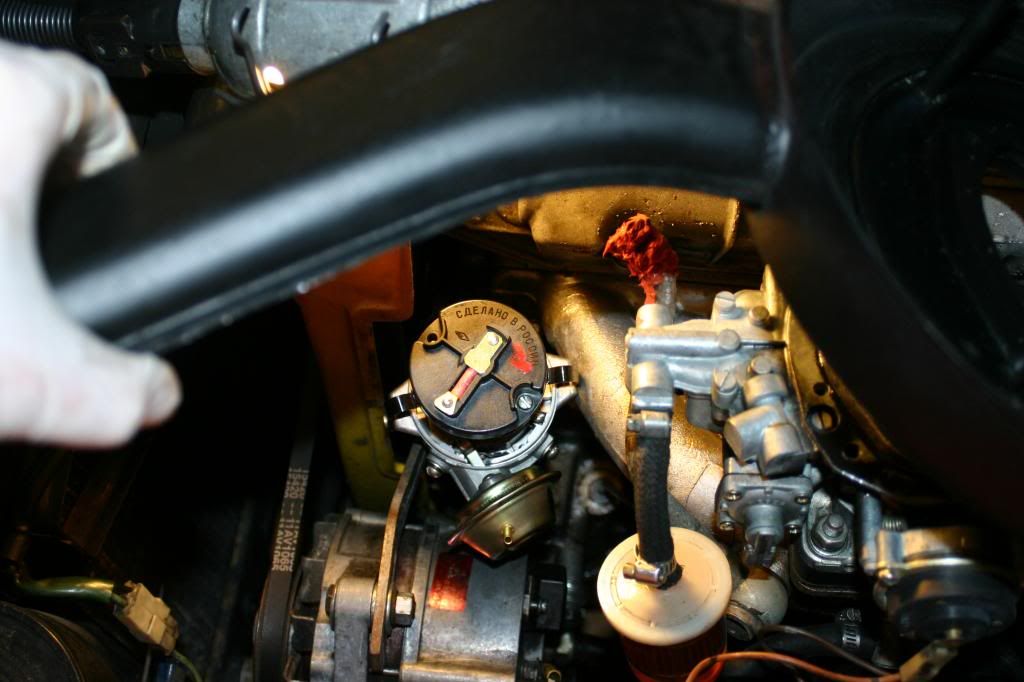
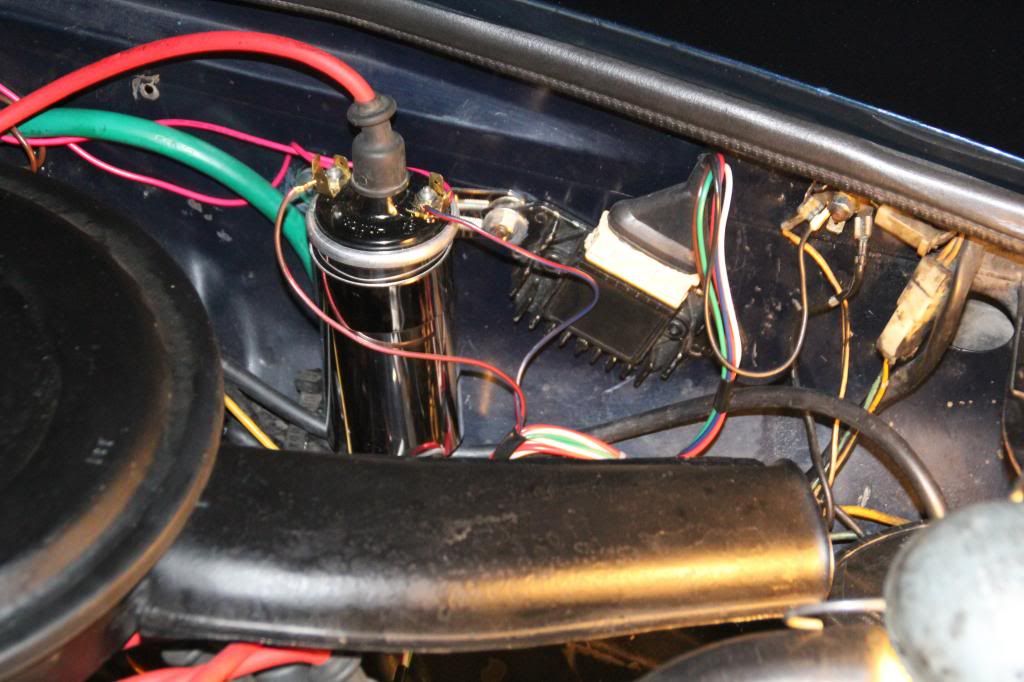
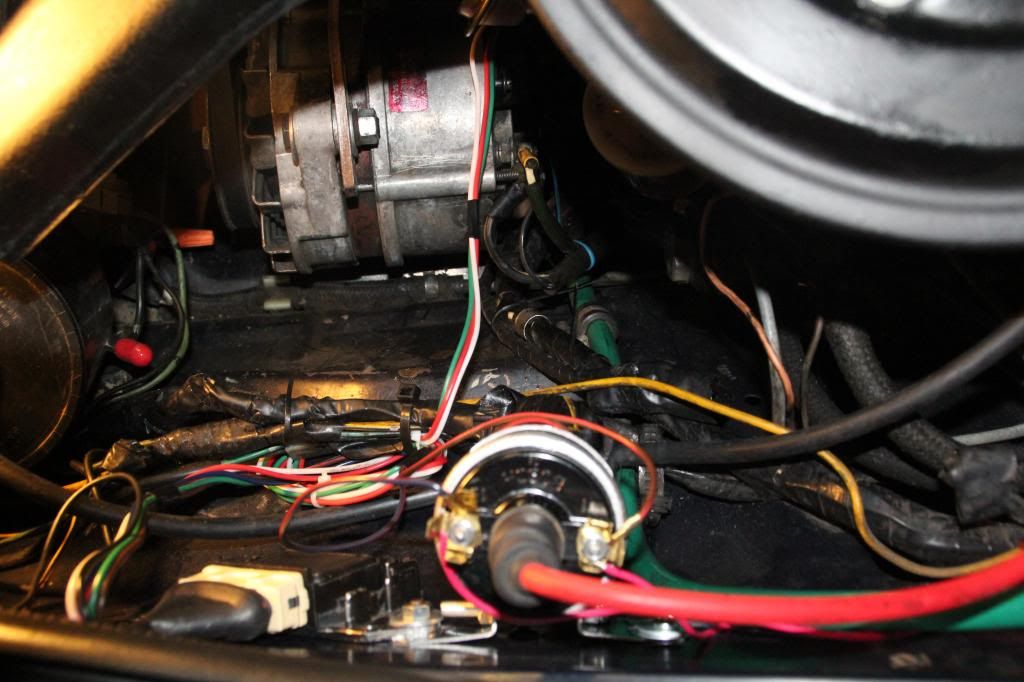
During the installation, it dawned on my that I would have to run both run 12VDC to the coil (I wish the instructions were clearer on this), and I would have to rewire my tachometer if I wanted it to work. I decided (at least for the time being) to simply run extension wires from the original coil hook up on the passenger side, above the fire wall, and to the new coil on the driver side. The idea was to make this very easy to "reverse the installation" if I decide to go back to a traditional setup. In the pic below, you can see the red wires I added from the old coil position to the new coil. Not the prettiest thing, but it is completely reversible and fully functional.
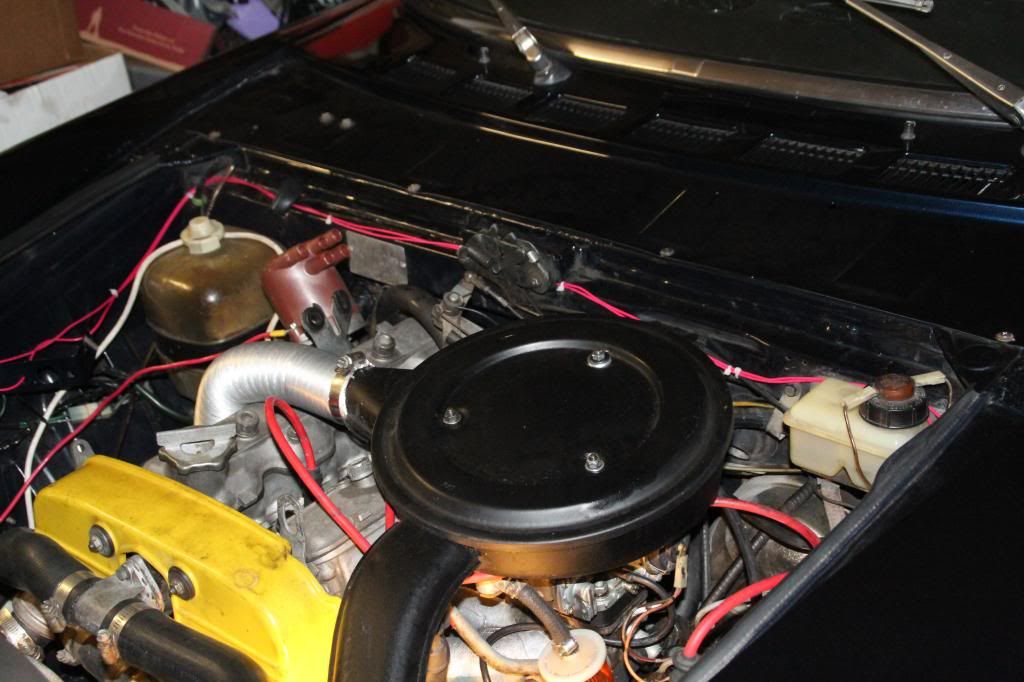
Also note, I have not removed the old dizzy yet - but all the electronics are disconnected. I also have the old coil still in place at this stage.
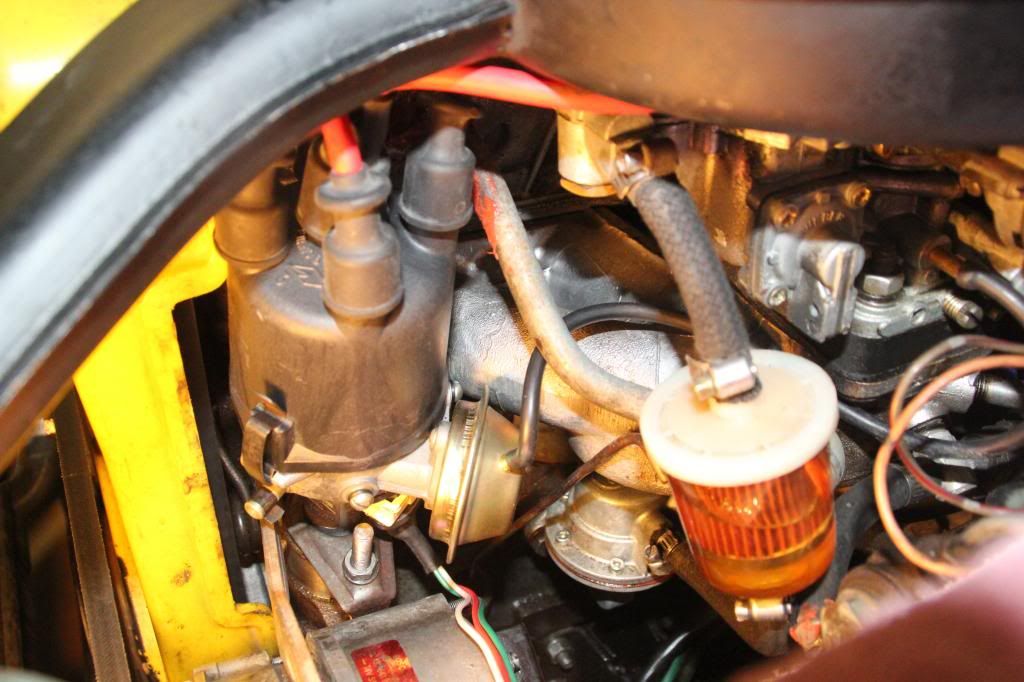
Here is a close up of the wiring in the new set up.
The wiring harness (the colorful bright wires) had more length than I needed, so I coiled up the extra length, tucked it away and tie wrapped it down.
Of note, my spark plug wires (except plug 1) really had a hard time reaching the plugs from the new dizzy location. If each wire was about two inches longer, I would have felt a lot better. They all fit, but I don't like the "bends" needed to make everything reach. I contacted Vick's and this was the first time the heard of an issues with wires being almost too short. I got my wire from IAP, but Vick's said their wires should have no problems. So if you need new wires or have IEP wires, your might want to order a set of wires from Vick's if you do this transplant. You can see some off this here:
Also note, I have an 1800, but I have a Weber 32/36 DFEV. As a result, I used the "bent" air filter from the original 1972 engine to fit the shape of this carb. All the wires fit under the air filter, but there is not much space. If I were running a "lunchbox" air cleaner, there would not be any clearance issues. I don't know how the clearance would look with the 1800 air filter on, but my guess is it would be marginally better (it doesn't bend down at the end).
Note that the new dizzy is held down by the clamp that previously held down the "plug". I was able to get things to tighten up respectably, so I am optimistic the mount will hold up well under extended driving conditions. I will have to reuse the plug once I remove the original dizzy. However, it is too long to fit in the cam tower, and the "thin part" (about 1 1/4 inches down) will need to be hacked off with a saw. I will then use the original dizzy clamp to hold the plug and plug the cam tower hole.
Ok, enough already with the installation....so how did it drive???!!??
The first test drive I put on about 20 miles - and it felt great. Recall I disconnected the vacuum advance on my original, and even so after running and stopping, the advance would stick and it would rev way to high. Both problems are now solved. The vacuum seems to be working smoothly and seamlessly, and the advance returns every time I slow down. The advance curve seem just about the same as on my original, but everything seems to run smoothly and it just feels "stronger". Could be a better spark for the new coil, or it could be just everything is new. So far even with the "bends" in the plug wires, they all seem to be working perfectly.
However, I created an small oil leak in the process. I later added an additional gasket on the dizzy and I am waiting to see if this cured my small leak.
Verdict: So far I am feeling good about this. I plan on putting a few hundred miles on this setup (making sure everything is solid and there are no oil leaks) before removing and plugging the original cam driven dizzy. I can get the original setup working in about 15-minutes if I need to (sort of cool right now, I have a back up ignition system already installed...)
I will post after putting some more miles on it. The only concern at this stage is the small leak - and it may be fixed but I want to put on more miles to see.
Stay tuned.